
I'd been looking for an affordable way to furnish the wall above my garden tub, that would complement the luxurious (but budget-friendly) chandelier that I purchased at Lowes, and fill the space rather dramatically. I toyed with the ideas of roses, flowers, phrenology heads, anatomy and butterflies. I set that aside and thought about the space.
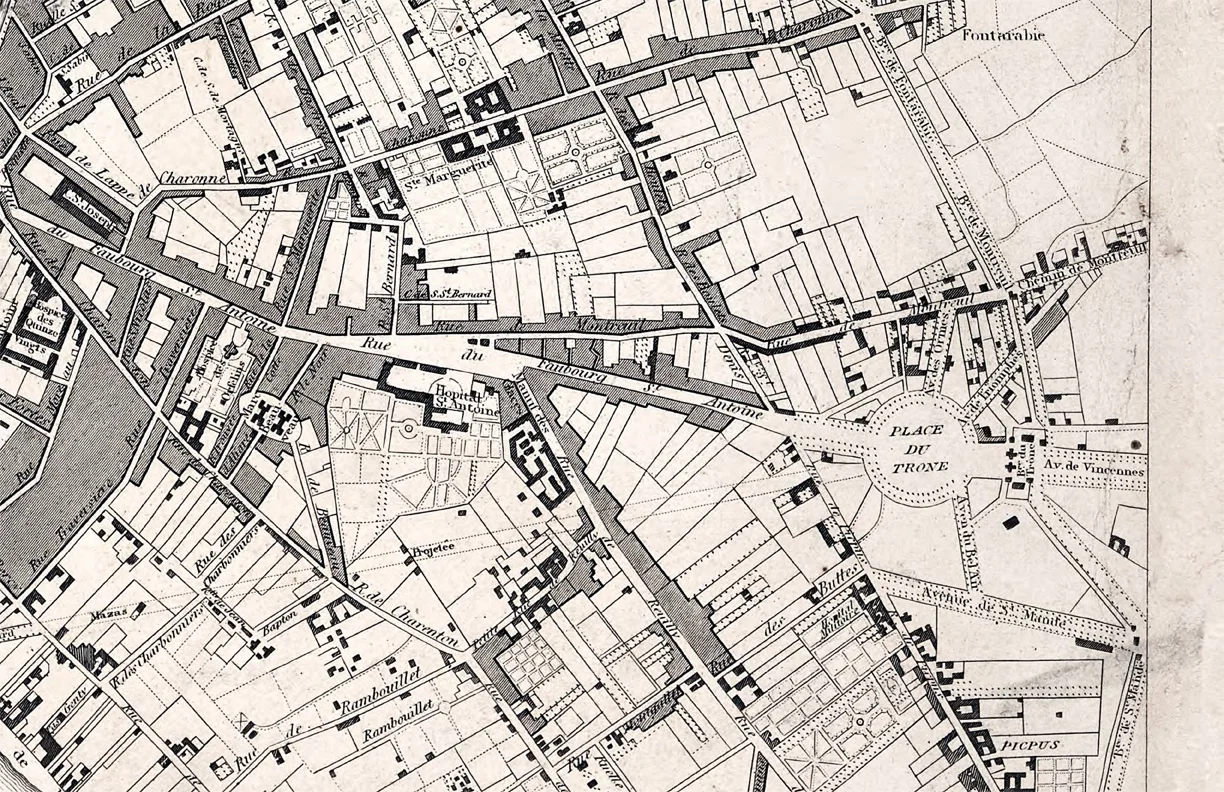
On measuring the height and width of the wall, I played with the numbers to figure out what would fill the space using inexpensive plastic/glass frames from a large discount chain store. Oh, what to frame, what to frame...if only I had a (nother) map of Paris to hang in my home...
I sell this set of 8 files in the shop! As I always say, I am here if you need help!

STEP 1 - FRAMES
I purchased these 11x17 frames from a local discount chain store that begins with "W" and ends with "t." It's an odd size. They also have 11x14 and 12x16 so it could be confusing - be sure to check the sizes since the project is not easy to re-size for alternate frames. You can also find inexpensive 11x17 frames at a few different crafts stores and framing chain stores.

STEP 2 - PRINTING
Printing is really a complicated process, so this is a simple approach here, and if you get into trouble and need help you can ask me. You may have noticed if you work in an office or use an ink-jet printer at home, that the average printer will add approximately 1/4" inch margins to your project, whether you like it or not. The effect of printing edge-to-edge in all four directions is called "full-bleed" and requires a special printer that can accomplish this, or a professional printing company that can crop the pages for you. I sent off my project to a professional printer - this could be a local sign company, a small print-house that makes posters and brochures, or a reprographics company that does plans printing and color work. It's not to hard to find one, and you can call and find out if they have the right capabilities and how to get the project over to them. I e-mailed the files - they are PDF's.
I gave them instructions just to run them, 100%, that I would trim them. This saves a few bucks - and I love to cut things up. I realized the other day, I have been cutting things ever since I could walk and talk, it is one of my most practiced skills aside from typing and clicking on this mouse thing. So here's what they looked like when they came back from printing - the individual map pages, each with a large white border around them. I call this photo "Fiskars on the Seine."

STEP 3 - CUTTING AND FRAMING
So I sit and watch an old episode of Perry Mason and cut out the maps. It's good to be precise, even though the frame edges are a little bit forgiving, so a well-lit space is helpful. I have an Ott Light I use - that way you can better see the contrast between the cream colored map and the white paper on which it was printed. I photoshopped in a French manicure on my raggedy thumb to set the tone below where I am opening up the frames and separating the glass from the black plastic frame. There is a nice little set of instructions that comes with the frame that I recommend reading. Be gentle with the glass, push evenly, moving around the frame, and eventually it will come out of there. I keep them together and kind of slip the document I am framing into the frame, I only take it apart if it appears to need cleaning or if there is a lot of little bits of fuzz around.

HINT - the frames have an up and down direction. Don't follow the photo on the front - sometimes it isn't inserted in the correct direction. Look at the back - photo below - and check for the hanger-hole location. Make sure it is at the top of your project so that when you go to hang it on the wall...have you been there? I have - many times, so don't stress - these are easy to flip around too.

STEP 4 - INSERT AND ASSEMBLE
So keep cutting and framing those sheets until all eight are done. Or you can cut them all out and frame them all next. The glass snaps back in carefully and I am most successful when I gently apply pressure to the corners and rotate the frames in my hand - eventually it snaps in. Another hint, the glass isn't flexible but the plastic is - make sure you are working the plastic side and not trying (inadvertently) to bend the glass. Here they are all lined up on my floor. And soon I will be able to update you with photos of the installation on the wall. I don't want to do my usual "oh, I'll just stick it here" job of hanging since I am going to show other people how - so I will be measuring and carefully determining where the nails go! My friend Kathy, who always measures, will be so proud.
